Wednesday 31 August 2011

Progress!


 I am greeted by this lovely sunflower on my arrival at the allotment at the moment - it's so cheery!!


 Ok, so down to work - I had trouble getting this stake out, so I had to leave it until I could get some "man power" behind it.

 As you can see, there are several "extra" stakes along this side of the last raised bed, which I had forgotten about, but they were put in for a reason - to provide extra support to this side.


 So in the end I decided to leave it where it is (the side of the raised bed that is, and now I have this lovely area to one side of the fruit trees.


Here is the view from the other side - it to me ages to break up and rake the soil.  I also put in a good few handfuls of 6X - a chicken poo fertilizer thing which other allotmenteers swear by.

If you look carefully, just past Tatty the Scarecrow and focus on the middle of the picture, you will see a little pussy cat, helping itself to water from the bird bath

Closer....


And closer!  Naughty pussy cat.

I also managed to rake over the soil (and 6X it) to either side of the leeks

So I had a few good hours well spent at the allotment this morning

Wednesday 24 August 2011

Thankfully no more blisters today....

The first thing that I had to do was to lift the strawberry plants from bed 2 and put them in what was the raised bed from plot 121.....


I found that a few split so I put them in separately in the hope that they will take, so this is the finished Strawberry bed, which I have covered in netting.


 Thankfully the rain did it's thing and I was able to fork over the old path area on both sides of raised bed 2.  It was still hard work but I thought it would be more beneficial to loosen up the areas that had only the other day been pathways!


As you can see, with little effort the ends started to come away, that's how bad it was getting.


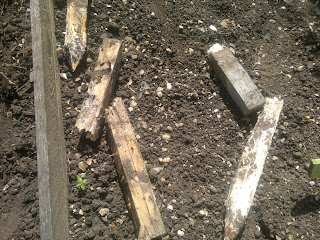
I managed to get the sides and the lengths of wood away from the stakes and leaving the top end in place, I stored the wood neatly as they may come in useful. So here you see the frame work removed.   Wow that space is already looking huge and like fantastic growing space. 
 I must say, the soil is very very nice and will only need a little TLC this year.


You can see here, how badly rotten the stakes had become!!

Monday 22 August 2011

Blisters!

I have decided to give my plot a make over!! Yes, I have been watching 60 minute make over for some time now and I have made that brave decision - to get rid of two of my big raised beds!!!

I am going to keep RB no.1 which is closest to the gate area as that will keep a nice "start" to the plot but I am going to get rid of no. 2 and no. 3 due to two factors 1. being deterioration of the wood used and 2. because I actually like the other half of the plot which is just neat rows.

Further more I will be giving up plot 121 this year, which is where I am currently growing loads of potatoes, and I have a scaffolding raised bed on there which I will bring up to 144 and place down the other end by the greenhouse / shed area.

So, today I thought it would be sensible to rake up the wood chip paths between the raised beds. So I raked and raked and raked and got a blister the size of a 20 pence piece on my thumb joint!!  I raked some more and spread these wood chippings (recycling) over my path that's by the fence and to the front area by the fence.

After that I had to chip away at the top level as this had been compacted down with all the walking up and down.  This was hard work as the ground is so dry, but I am hoping that the forecast rain, tons of it over the next few days, will help, so that's the reason I spent over 2 hours there today.


It's falling apart!!!


The top layer of wood chip has nearly gone


Just need the rain to come along to help now!!

Once the rain does it's thing, I will remove the wood sides and let the soil that is in the raised bed, tumble over and then I will have completed my "makeover".

Hey Presto.

More soon - promise.

Friday 19 August 2011

Stringing them up....

...my onions that is!

I learnt how to do this last year from this site:
 http://www.powen.freeserve.co.uk/Guides/stringonions.htm

Give it a try - it's the best way to store them

 Sorting out the sizes - Large, Medium & Small


 The first string in progress

 After trimming off the roots and the ends the first string is ready


Three Strings later (the one to the far right are the over wintering onions) and I had to call it a day as there are about another 5 lots to go!

Wednesday 17 August 2011

Recent Harvests

Savoy Cabbage, Apples & a Pear


Plums & Cucino (Baby Cucumbers)


Cherry Tomatoes, Cucino, Courgettes & Cucumber (not in photo)

Wednesday 10 August 2011

Onion Harvest

I needed to get to the allotment desparately.  After recent events, I have let it go to pot a bit, well a lot actually!  So, once there I tidied up the peas - well pulled them all out actually, dug over their spot and the earth to the left where the first earlies were grown, so that was a good 5ft across dug over and raked!

Then it was time to lift the onions.   I planted 3 rows (staggered) along the width of the plot (17ft??) so there were quite a few of them!

I put them in the Greenhouse to dry for a few days - I couldn't risk leaving them outside as the risk of showers is still prominent!!

The first haul.....


Some more....


Had to put some on the floor (on a tray).....


And more on the other shelf opposite...


And finally some were put on the wine box - phew!!